How to take the ID photo to put in your resume
This post is also available in 日本語
When you look for a job in Japan, whether you are looking for full-time employment or a part-time job, you will normally submit a resume. At that time, it will be necessary to attach a portrait photo taken within the past three months. In this article, we shall introduce some points regarding the taking of ID photos and how to use the automatic photo booth machines.
Contents
Your photos can determine whether you pass or fail
Most employers will perform document screening with the resume before an interview. When screening documents, they will need to compare many applicants within a short period of time, so the first impression that they get from the photograph will be very important. Also, a picture taken with your smartphone will not give a very good impression. Use a proper photograph from a photographer’s or one from an automatic photo ID booth machines.
Clothing and grooming to give a good impression
Generally, “hygiene and freshness” are important.
Clothes
Wear a suit for the ID photograph to use when hunting for a full-time job. We would recommend wearing a black or dark suit with a white shirt or blouse. Avoid flamboyant coloring on your tie.
For a part-time job, it will depend on what clothes you will wear for the actual work. If you will be wearing regular clothes for the job, then regular clothes are fine for the photo. Avoid flashy colors and patterns, and dress to give a hygienic and relaxed impression.
Be sure to avoid wrinkles or dirt on your clothing. Make sure that the collar is not twisted and that you do not have any buttons missing, or that your tie is not skewed.
Expression
Being expressionless does not give a good impression. A good smile is important. Make sure you look directly ahead with the corners of your mouth slightly up. A smile that does not reveal your teeth is probably best.
Posture
Sit up straighten your back and stop slouching.
Hairstyle
Your hairstyle makes a big difference to the impression you give. In particular, make sure that your fringe does not cover your eyes. Long hair on ladies should be gathered in one place behind them. Avoid individualistic hairstyles.
Make-up
Flamboyant make-up does not give a good impression. Avoid dark colors for eye shadow or lipstick, and aim for a natural style of make-up.


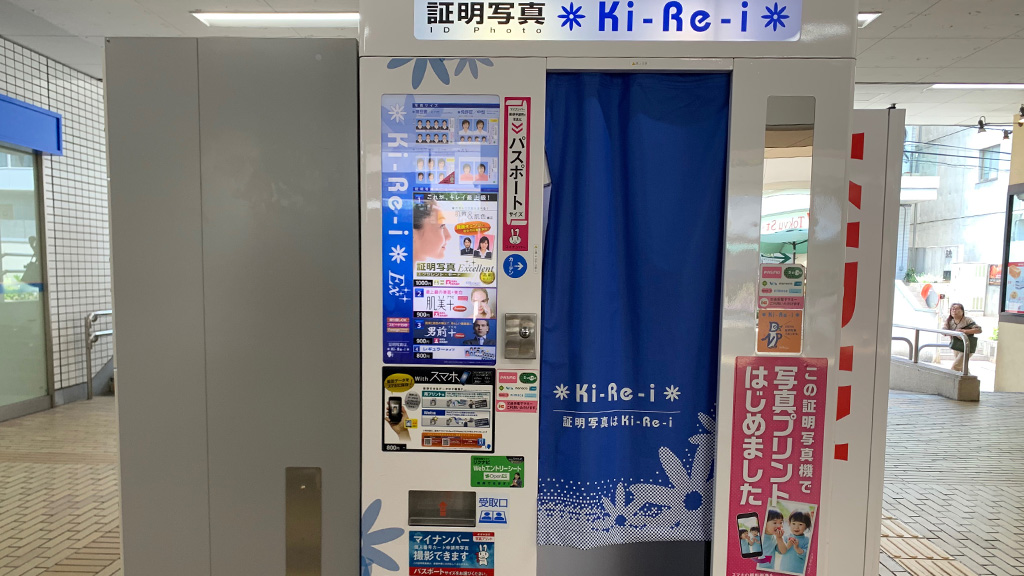
Places where automatic photo booth machines are located

These are in a box shape and are located in stations and other facilities.
Flow until the photo is taken
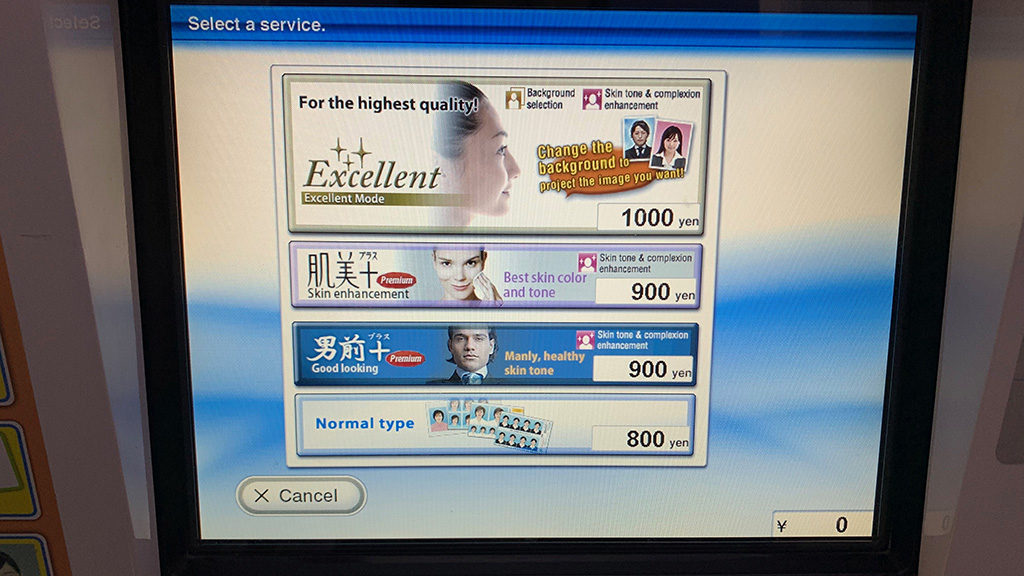
The price of the photos will be displayed at the automatic photo booth machine. There are options to make your skin look good or make men look handsome. These all differ depending on the machine, and the price for each is different.
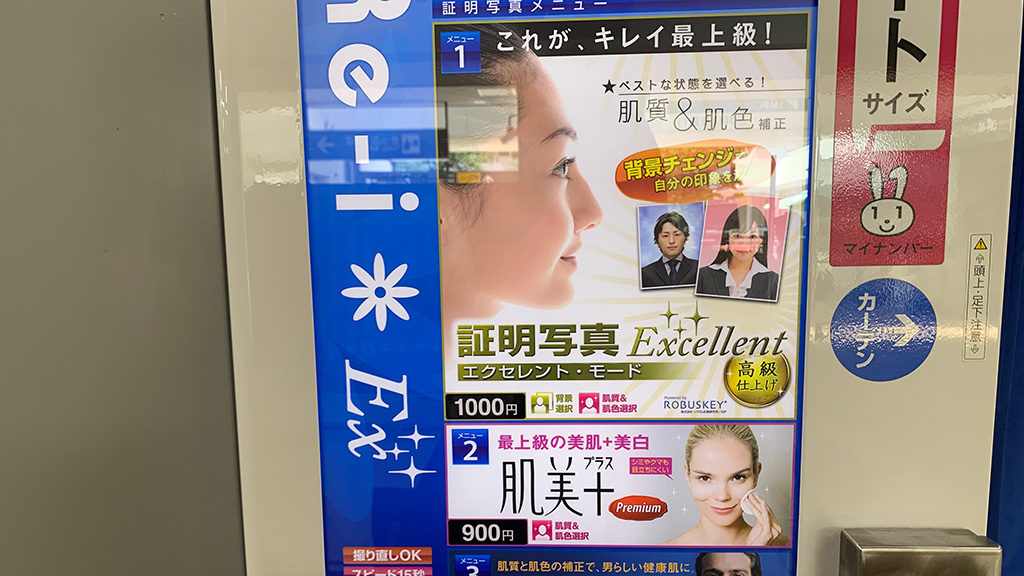
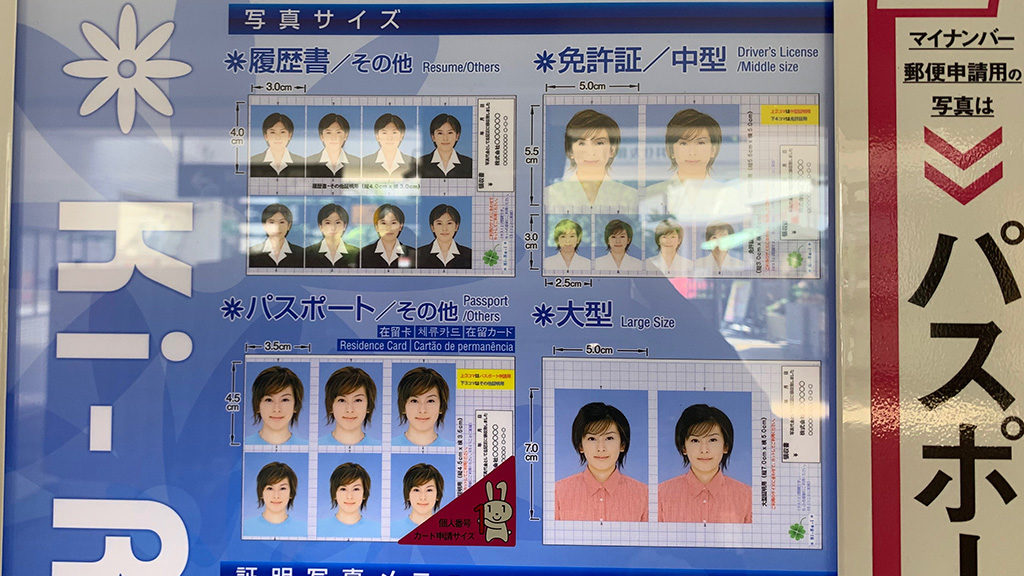
Even with the same regular type, note that the printed size will be different depending on the purpose of use.
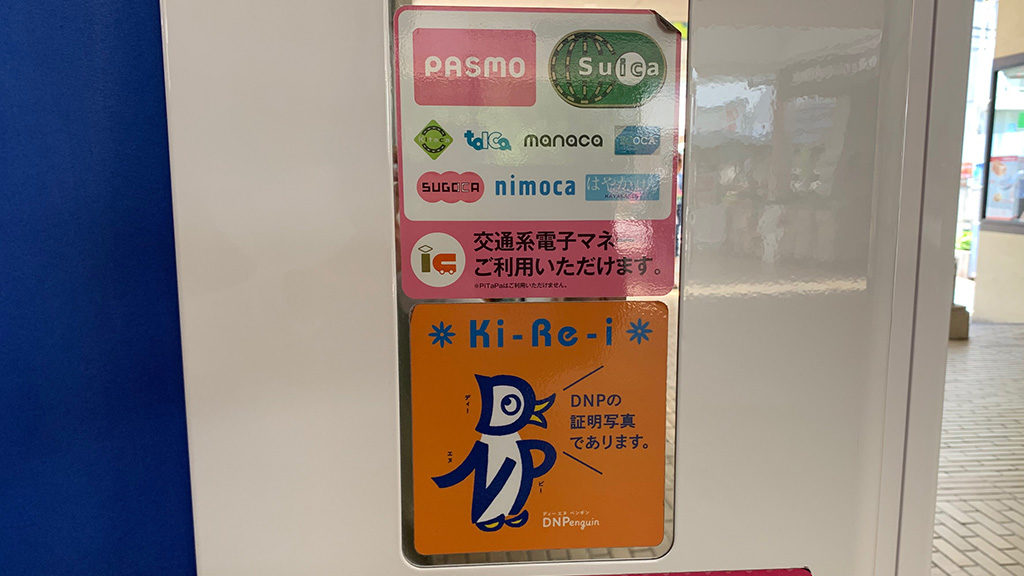
In more and more machines, you can pay not only with cash, but also with IC cards such as Suica etc.
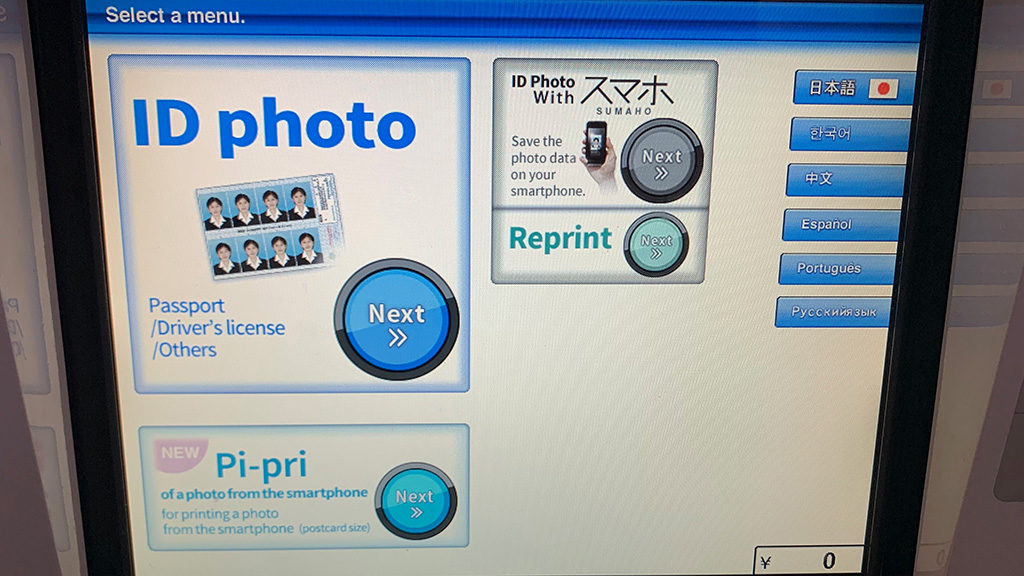
The method of use will differ depending on the device, but we shall look at the flow using the machine called “Ki-Re-I”.
1. For multilingual-compatible machines, select the language to used first, followed by the photo course. On this occasion, select [ID Photo].
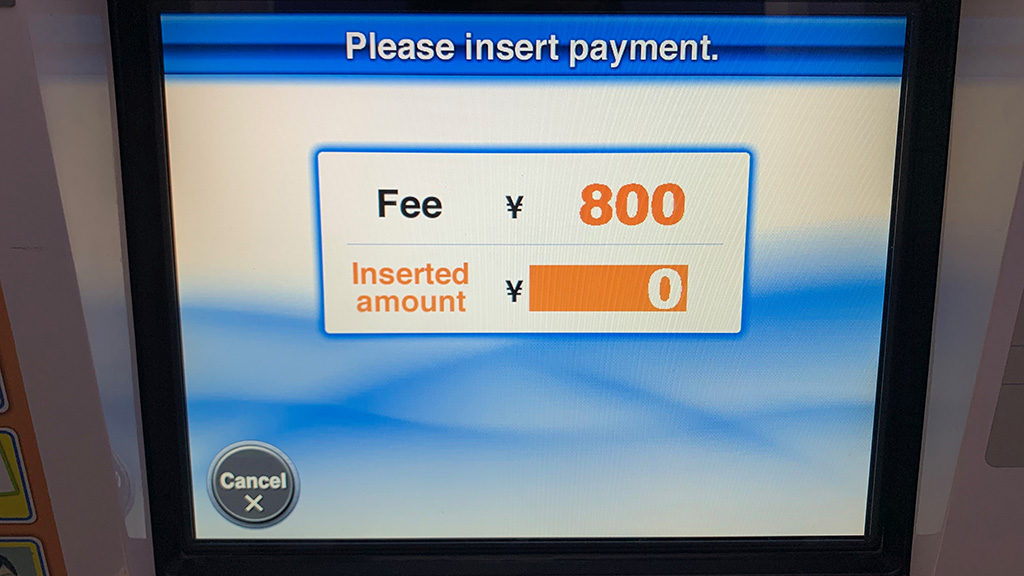
2. Select the method of payment. On this occasion, we shall select [Cash].

3. Select the menu item you would like. On this occasion, we shall select [Normal type].
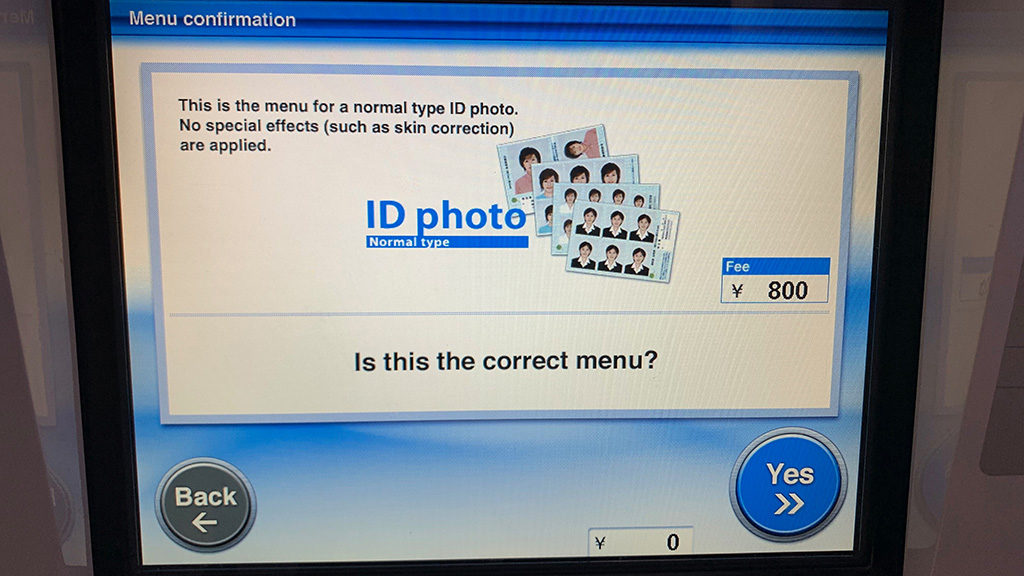
4. The confirmation screen shall appear, so press [Yes].
5. Pay the charge that is displayed.
6. Select color or black & white. On this occasion, we shall select [Color].

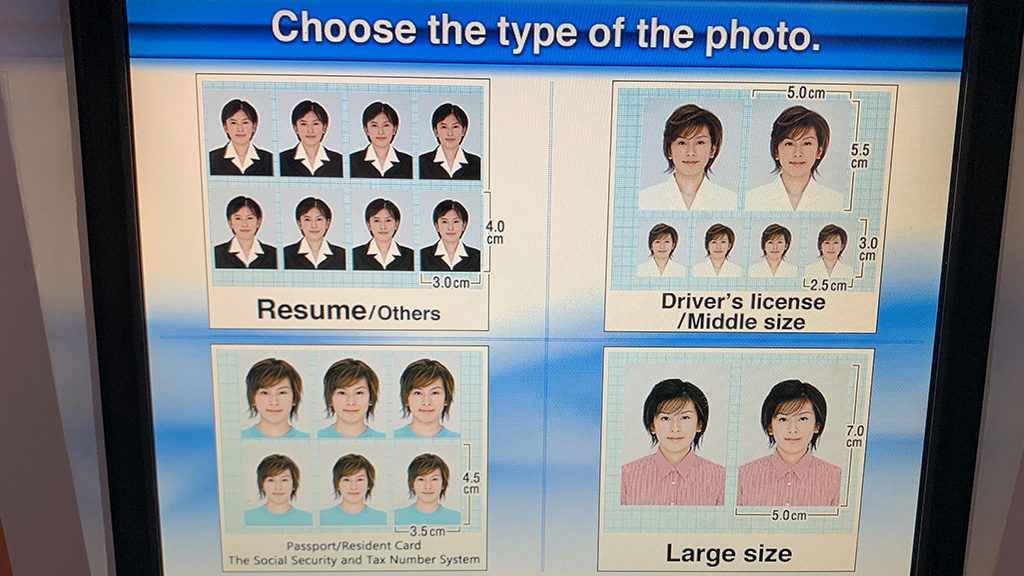
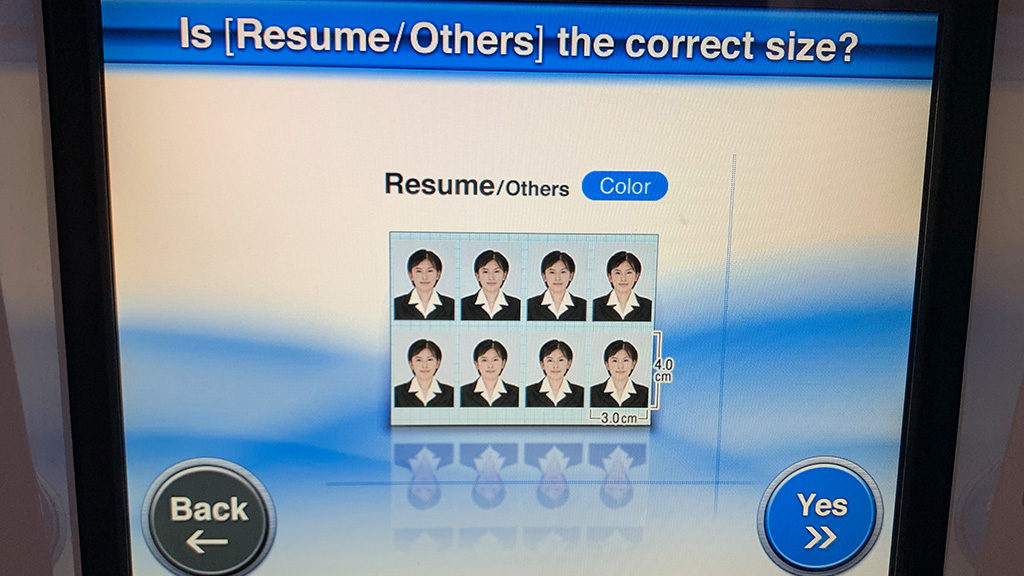
7. Select what you want to use it for. On this occasion, we shall select [Resume].
8. From the confirmation screen, select [Yes].
9. Some points to note before taking the picture shall appear. After confirming these, press [Shoot].

In the automatic photo ID booth, there is a rotating chair. If you rotate the chair, you can adjust the height of the chair up or down. There is a mark to which you should adjust the position of your eyes on the screen, so adjust this so it is right in front of you.
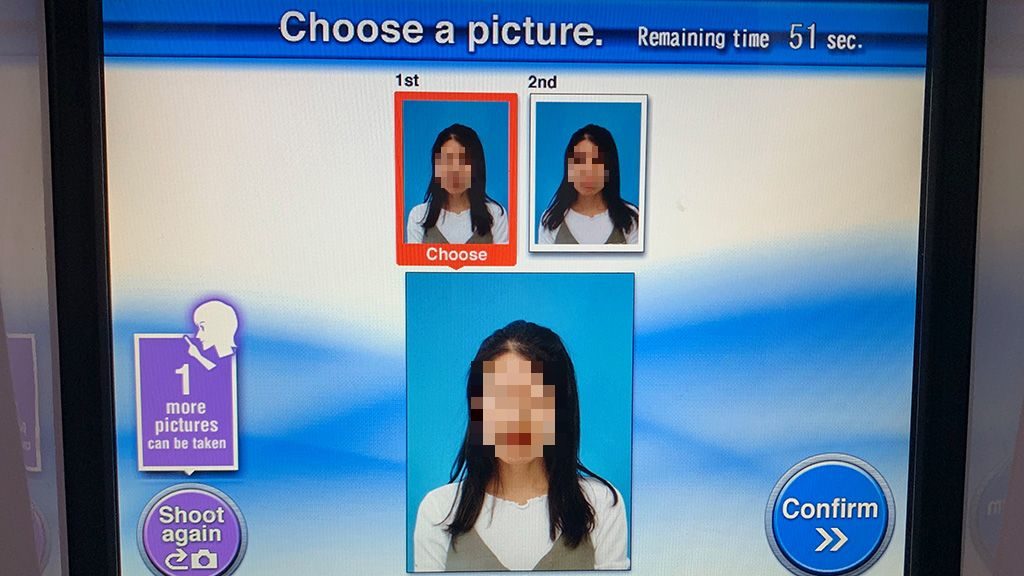
10. The photo that you took appears on the screen. Select the image that you want to use and press [Confirm].
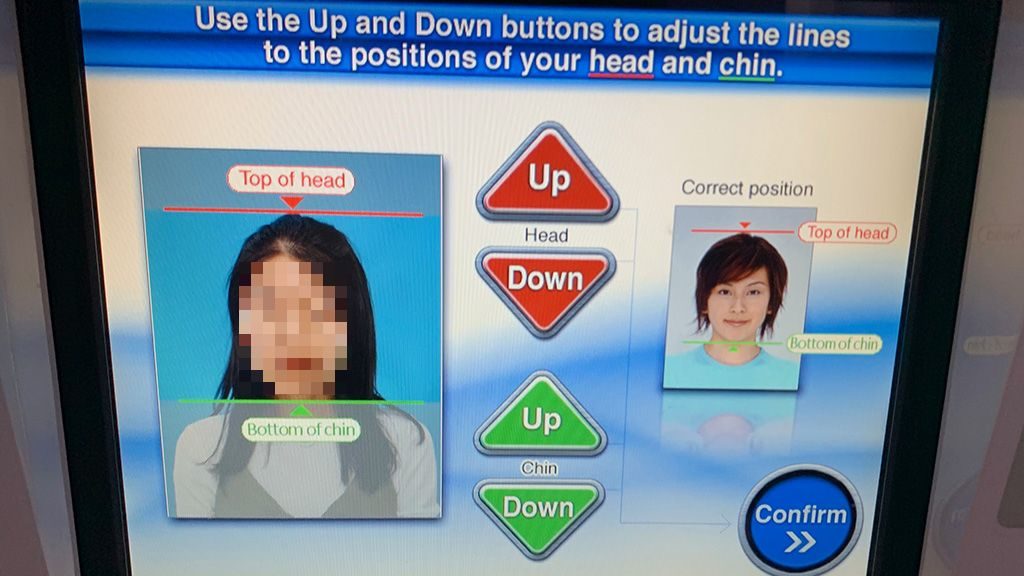
11. Adjust the position of your head and chin in the selected image, and press [Confirm].
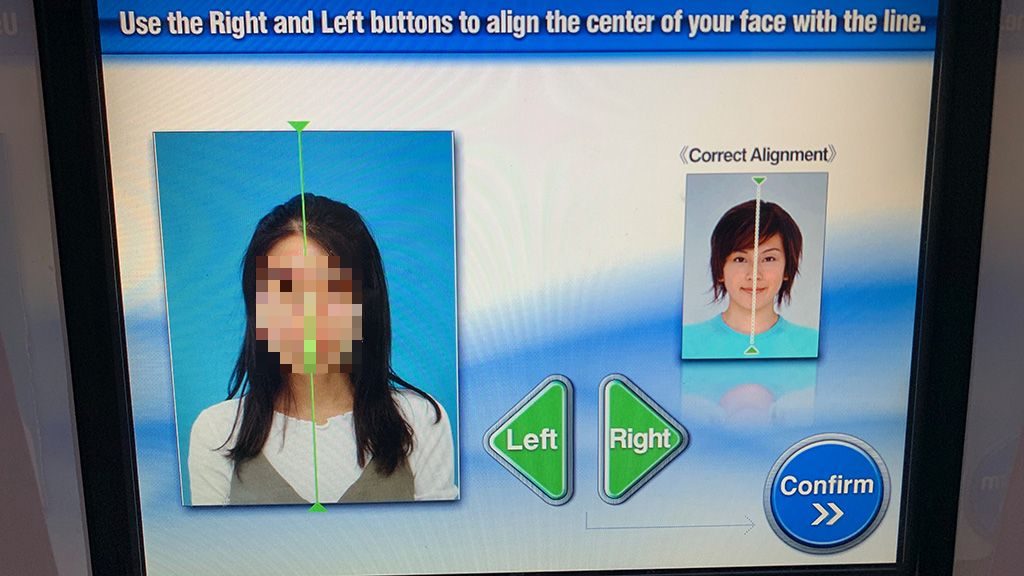
12. When you adjust the center of the face and press [Confirm], it will print out. Wait for the photos outside of the photo ID booth.
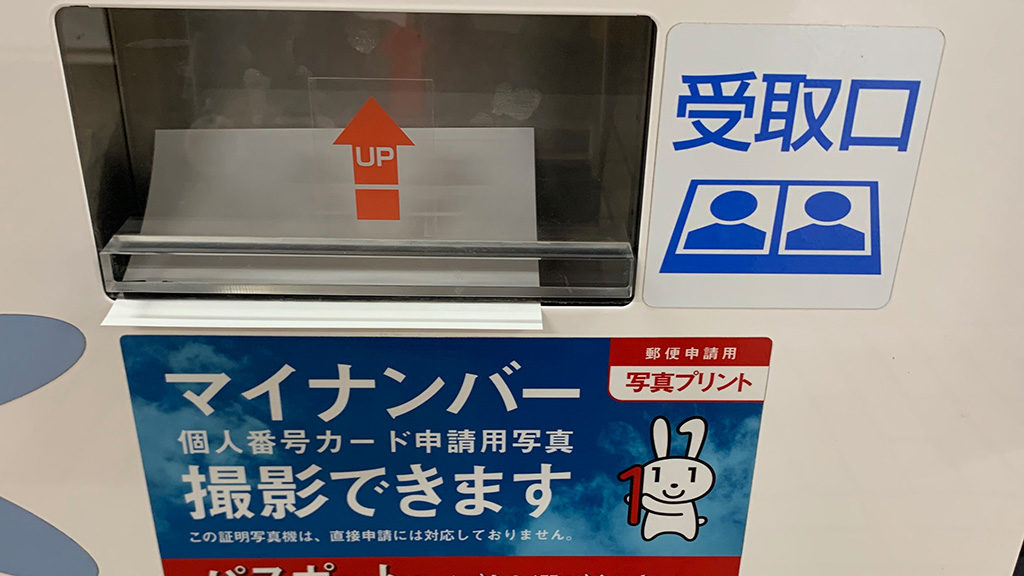
13. When the printing is complete, the photos shall be discharged to the collection point outside the automatic photo ID machine, so make sure you do not forget to take them.
- [Explained by a Legal Professional] Points to consider when you wish to work in Japan
- What are “Wagara (traditional Japanese patterns)”? Meaning and Prayers Accompanying the Main Japanese Patterns
- How to Write/ “Taishokunegai (Resignation Requests)” and “Taishokutodoke (Resignation Notices)”
- [For Foreign Nationals] Examples of Questions Frequently Asked at Interviews
- Types of Sushi and Its History